Tuesday, 21 October 2014
Character Activity Sketchnotes
It will be interesting to see what sort of feedback I get from the students presenting the activities this way.
The activities themselves work for me as they get the students to look at existing characters within video games, but also get the students creating their own characters using a variety of methods. Activity one is the sort of thing I want the students to ask themselves when they do their first assignment when reviewing a video game. While the remaining exercises as I just said are about creating characters from scratch. Something they will have to do for their game they will be designing. So I'm hoping these will be helpful exercises they can revisit.
Anyway below are the scans of the sketch notes (although rather wordy) for the lesson.
Sunday, 12 October 2014
Flipped Learning Update 2
In the initial update I did on flipped learning I forgot to mention unintentionally I had turned the game design unit, Unit 40 into flipped learning also.
The way this is running is that the students read the directed chapter of Level Up! By Scott Rogers before the lesson, make notes while reading. (A minority are doing this, but need a way to get rest to do so. However this seems to be a problem whether at home or in class across the board students don't like making notes!) Then in class we will do activities based around the chapter they have just read. Such as research the definition of what a game is using the books in the library (there is a similar exercise on what a mechanic is). Or I will select an appropriate activity from the Game Designers Workshop, or one of the other books I have. These activities can have them reflecting on a particular aspect of a game they have played, brainstorming game ideas, prototyping etc. I will also provide students with hand outs of optional further reading on that weeks subject for those that are really interested in the subject.
For example this week we started looking at story in video games. So before the lesson the students would have read level 3 of Level Up! (Chapters are called levels in the book). In the lesson the activities were the following:
- Using Story Cubes write a short story that begins "Once upon a time..." - the story only had to be about a paragraph. However a related this back to brainstorming and using this as an exercise that could be used to help generate ideas.
- Next they then did an exercise from the Game Designers Workshop that had them reflecting on the story of a recently played game, and what was broken about it, and how they could fix it.
I also handed out some information on story arcs,an article on using environment to tell story, and embedded some videos on the units VLE page that dealt with the Heroes Journey. The story arcs material will be the basis of the next lessons activities.
For me running unit 40 this way is the ideal way to run the unit. The dry theory is done outside the class, and creative fun stuff is done in class. We are able to concentrate on brainstorming as individuals or groups, there is plenty of opportunity to prototype games and mechanics, we are able to build confidence in standing up in front of people and present our ideas. For me game design is about ideas and creating. Within the class we apply the theory not just in looking at games we have played, but also in creating our own ideas.
The other thing I forgot to mention in that initial post was although at the time I didn't know it I'd already been thinking about sketchnotes and visual note taking, back in April/May time cartoonist Martin Shovel (I follow him on Twitter) announced a workshop aimed at communicators (http://www.creativityworks.net/training/cartooning-for-trainers/) the same week as the Develop conference in July. This was something I would loved to have done. Go look at the link If you haven't already. Learn to draw cartoons! Count me in. Well if scheduling and an external moderator visit hadn't clashed with the day it was held, and me not having the cash handy to pay for it (somehow don't think my bosses would see the benefit of this to pay) I'd of been there. Why? I want to be able to "spice" up my slides, worksheets, notes etc so they are more interesting for the students. Cartoons I think are the ideal way of doing this. Instead of trying to find that just right image, draw a cartoon to illustrate the point. Plus the cartoon may be the thing that helps the student understand the point where the words didn't. I will go to one of these, I'm determined to get to one.
So there you have it the forgotten stuff from the initial post on flipped learning. How I am also using it in game design, and a little of my philosophy of teaching it, and how I had already started to think about visual notes. Hope that this was also useful.
PS in a future post I share some of the resources I use for this unit.
Friday, 10 October 2014
Flipped Learning Update 1
In a previous post at the start of the Summer holidays I wrote a post about how I was going to give flipped learning a try in teaching programming to my year 1 level 3 students. The idea was that it would help the students in learning to program, encourage them to practice outside of the classroom, and allow the actual class time be spent on helping those students that need support and answering questions.
Towards the end of the Summer I got a moleskin notebook to use for recording notes about flipped learning, ideas, and a journal. And this is proving a useful thing to have handy. However my reading on the subject of flipped learning quickly expanded to included sketchnotes (visual note taking). I was particularly interested in this for use in the planned videos for explaining concepts and stuff in a hopefully visually way that would be more accessible for students. The outcome of this avenue of study is that I now have a small library load of books on this subject, and a need to allocate time in the day to expand my visual library. As part of my readings on the subject of flipped learning and improving my teaching of programming I have been reading Reflections on the teaching of programming: methods & implementations by Jens Bennesden, Michael E Caspersen and Michael Kolling. One of the initial articles in the book titled "Exposing the programming process" by Bennesden and Caspersen talks about process recordings which is basically a screencast of the development process with a tutor talking through their thought process while they tackle a programming problem. Which using teacher talk would be modelling. This is exactly what I aim to be doing with some of my planned videos.
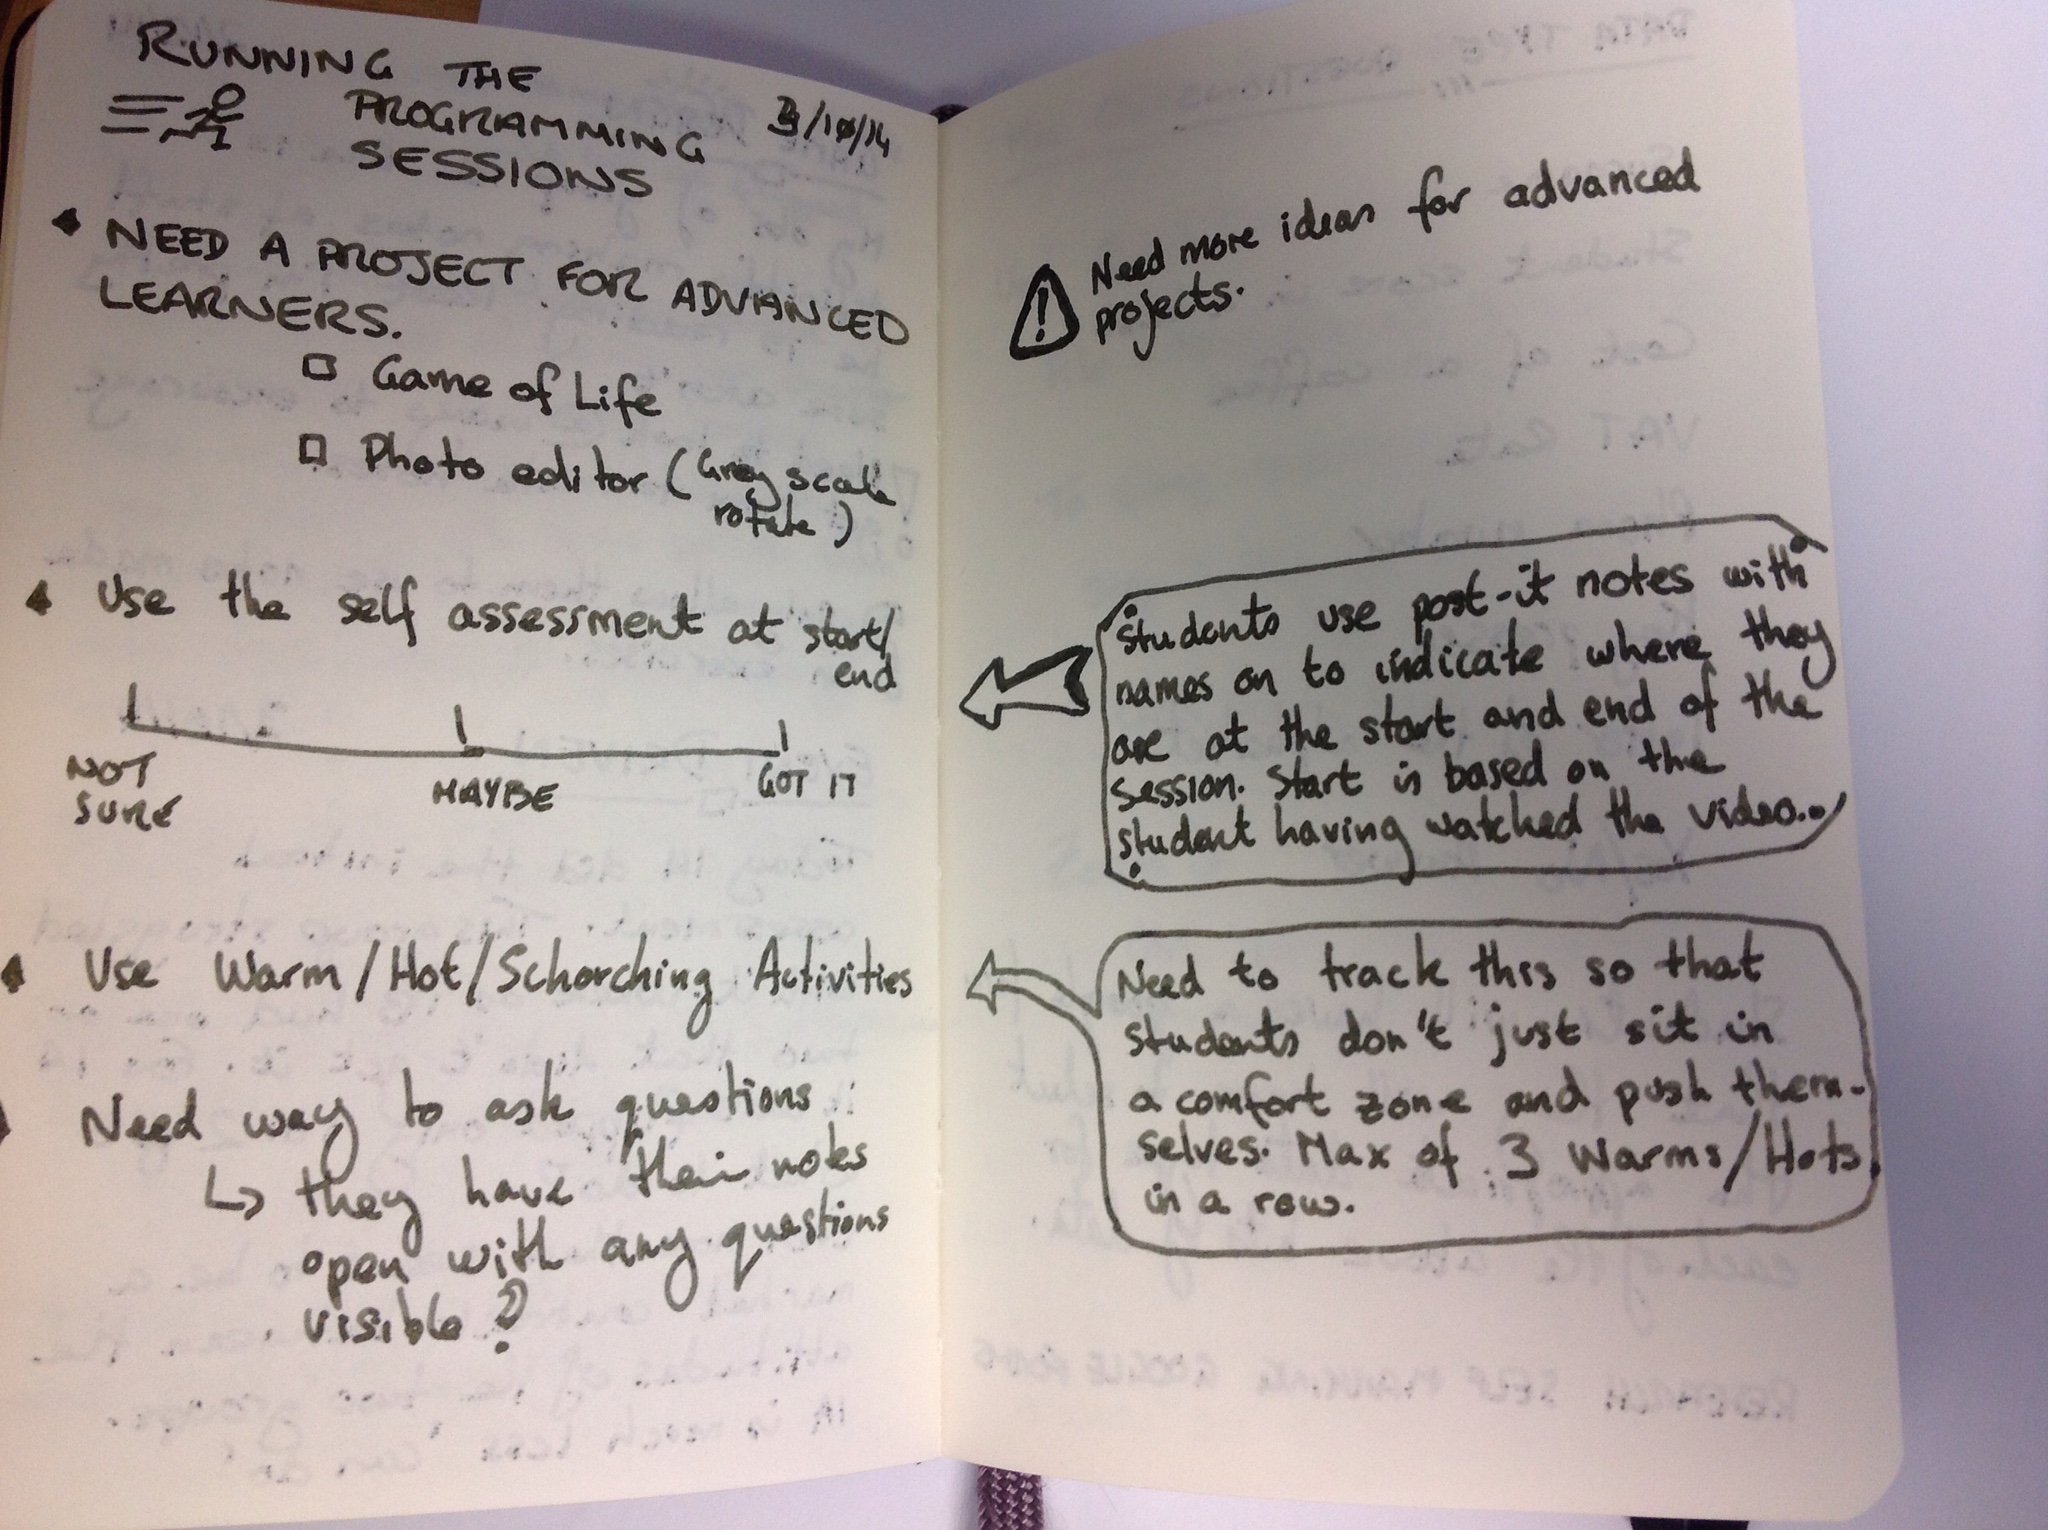
In the flipped learning books I have (Flip Your Classroom, and Flipping 2.0) there is some great stuff on why, and recording sessions, and one of them goes on further taking the flipped learning to a Master model. However I found both books weak on the how to use the extra time in class, especially as I don't intend to implement the Master model of flipped learning. It took me a little while to get inspiration for what I would do with the timetabled lessons and how I would run them. However I did think of a format (ish) for the lessons which you can see with my illustrative journal/notebook entry above.
Before I started flipping the lessons I created a quick google form for the students to complete that looked at their previous programming experience, and their mindset. I followed this up with the students doing a test aimed at trying to determine a students aptitude towards programming. I want to try and use this data to see if there is a correlation between this initial data and how the student progresses learning to program.
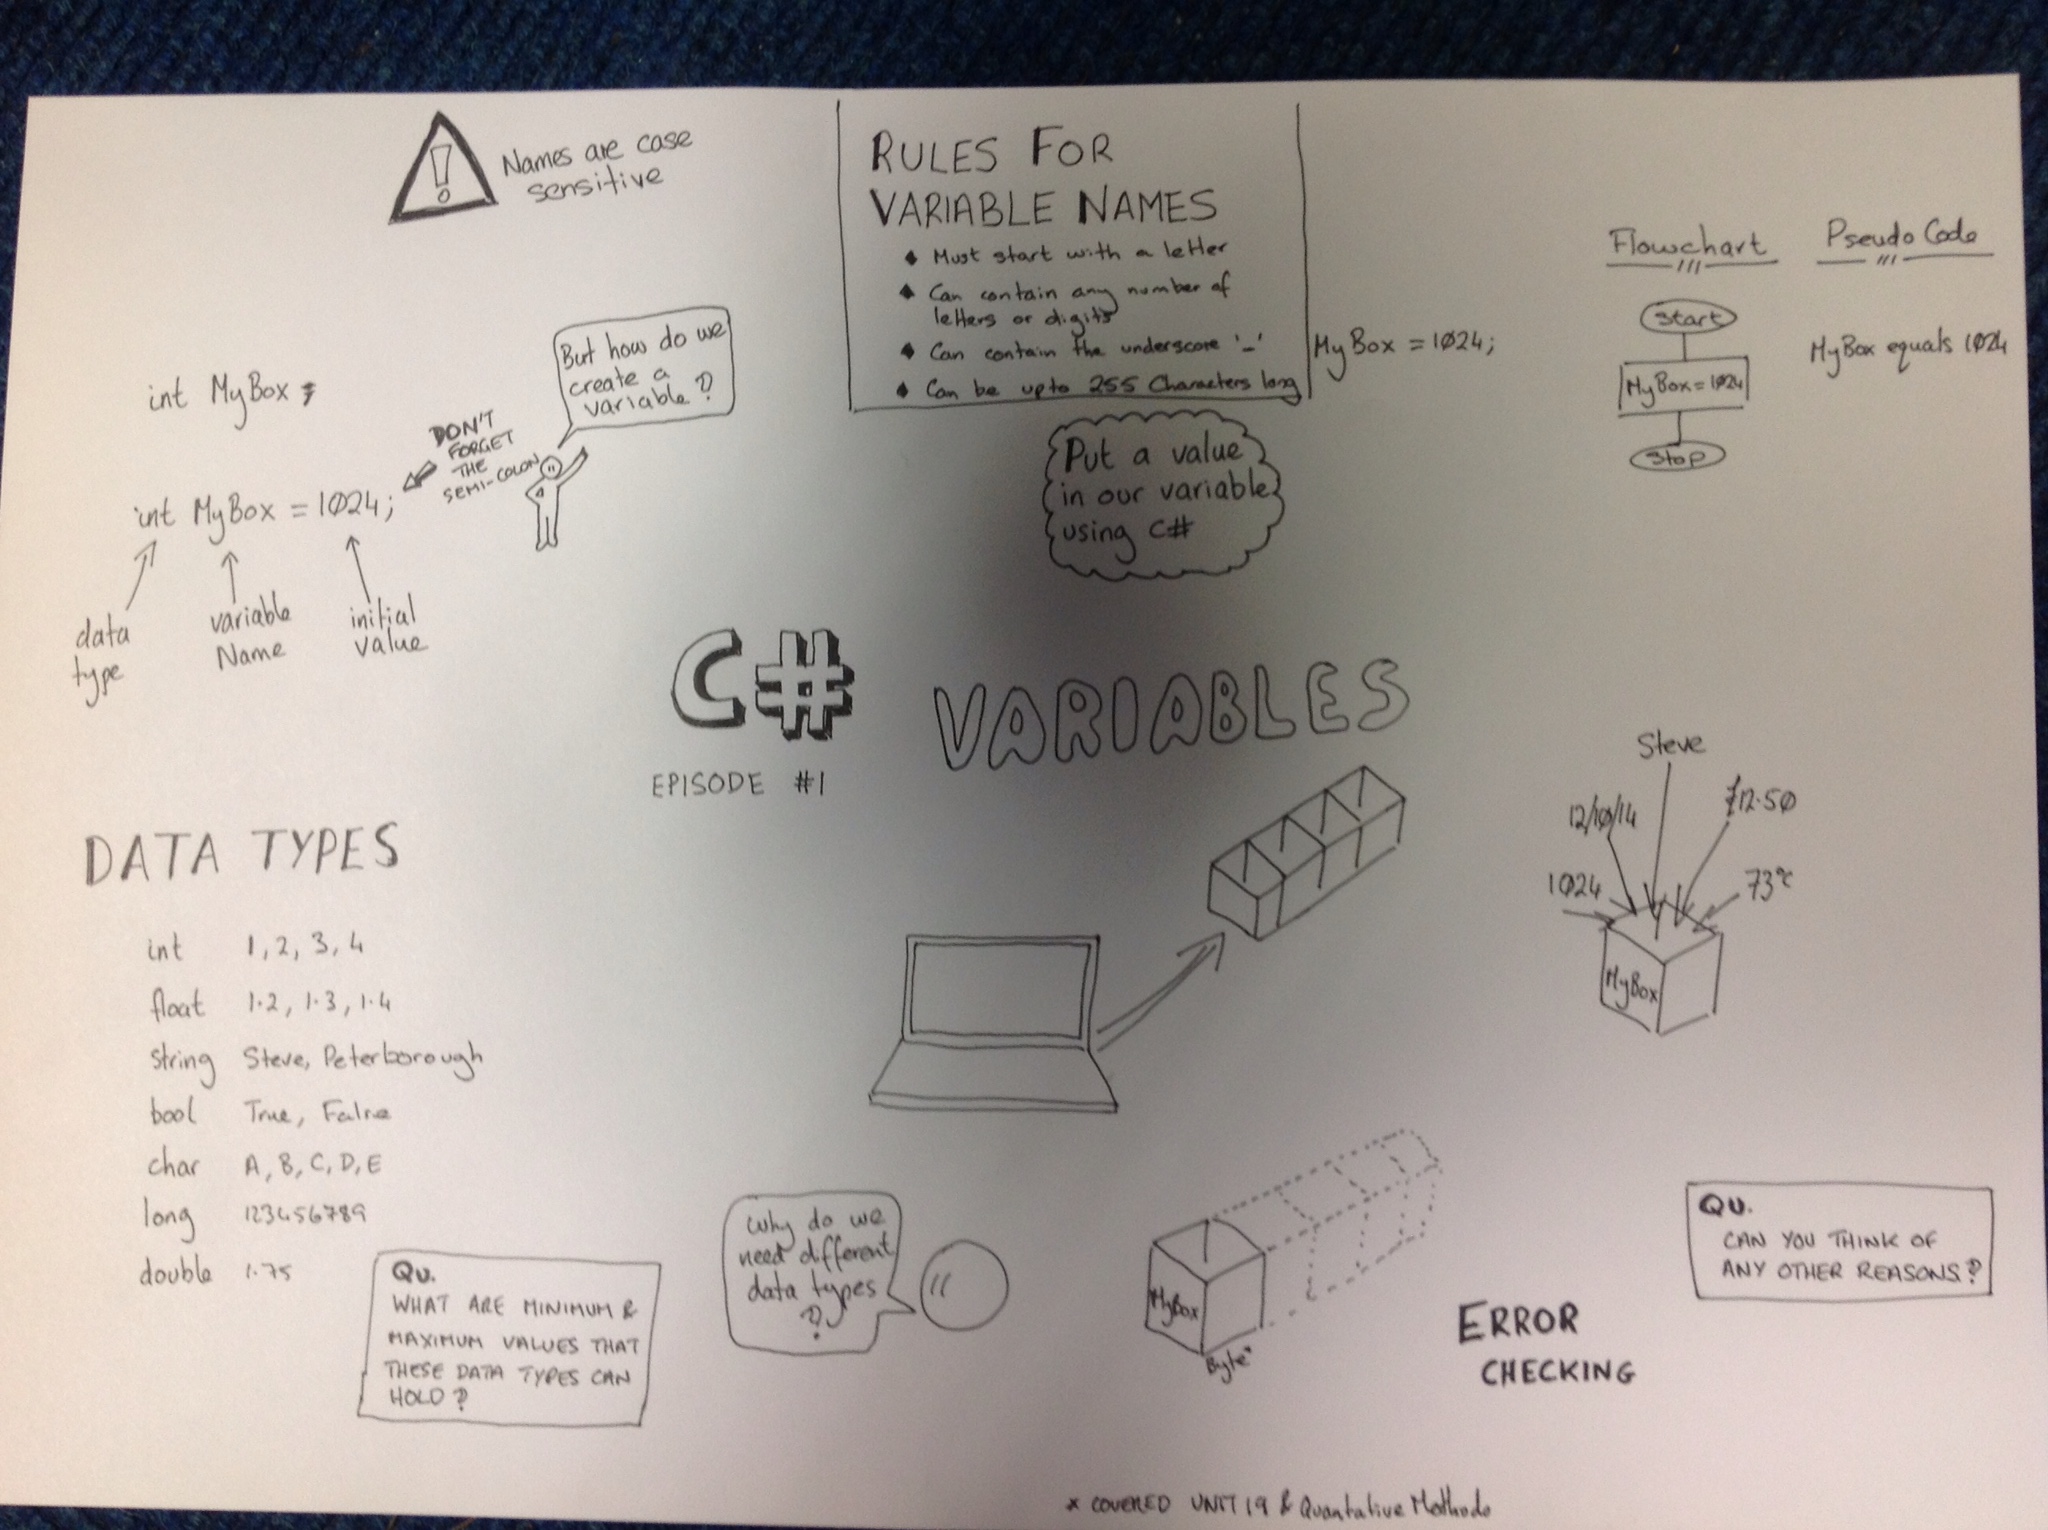
My first video went up on variables in C# this week. This was a nightmare to produce. I've not really found an app that I like on the iPad (dislike Explain Everything and Videoscribe) for producing a "sketch cast" of my visual notes that produces a video that can be uploaded to YouTube. Although I believe that with Yosemite on the Mac I can record my iPads screen. Which would mean I could use Adobe Ideas to produce my sketch notes and record the process on my Mac. However that wasn't available so I had to resort to drawing the notes on a sheet of A3 paper (The photo at the top of the post is the finished notes), taking photos at key points, putting those photos into a presentation and then screen recording the presentation on the Mac using QuickTime Player and capturing my voice talking through the presentation. For the voice recording I had bought a Blue Snowball external USB mic, which on the default setting gave me a low volume and very static filled recording, while on the second setting although no static, the volume was still very low. I wasn't happy with this and need to investigate why this is happening. But at the time I had no time to do this, and resorted to using the inbuilt microphone of my Mac. The finished result isn't brilliant but just about passable. Once the teething problems have been sorted, time permitting I'll revisit these early efforts and "improve" on them.
The feedback has been mixed, the main negative comments were about production values, pauses and my voice! Well I am a bit monotone. One student asked if they could have a copy of the final A3 sheet, seeing as they were the only one to ask I gave them the original. Positive comments included that they liked the short length of it, and they thought it explained things well.
I know some of the students only watched the video in the break before the lesson. I need to get this corrected, as they are not getting the most out of this style of learning. They are definitely not making notes to refer back to later.
Anyway I think that sums the current state of play. I hope it hasn't been too dry, and there is some useful info buried in here somewhere for you.


